Quickstart Guide - Docker
This quickstart will take approximately 45 minutes to complete.
Introduction
NEXUS is a collection of software that enables the analysis of scientific data. In order to achieve fast analysis, NEXUS takes the approach of breaking apart, or “tiling”, the original data into smaller tiles for storage. Metadata about each tile is stored in a fast searchable index with a pointer to the original data array. When an analysis is requested, the necessary tiles are looked up in the index and then the data for only those tiles is loaded for processing.
This quickstart guide will walk you through how to install and run NEXUS on your laptop. By the end of this quickstart, you should be able to run a time series analysis for one month of sea surface temperature data and plot the result.
Prerequisites
Docker (tested on v20.10.17)
Internet Connection
bash or zsh
cURL
8.5 GB of disk space
Prepare
Start downloading the Docker images and set up the Docker bridge network.
Set Default Docker Platform —
To ensure consistency when building/running on different hardware architectures, we should set this variable to ensure docker uses linux/amd64.
export DOCKER_DEFAULT_PLATFORM=linux/amd64
Set Tag Variables
Pull the necessary Docker images from the Apache SDAP repository on Docker Hub. Please check the repository for the latest version tag.
export CASSANDRA_VERSION=3.11.6-debian-10-r138
export RMQ_VERSION=3.8.9-debian-10-r37
export COLLECTION_MANAGER_VERSION=1.2.0
export GRANULE_INGESTER_VERSION=1.2.0
export WEBAPP_VERSION=1.2.0
export SOLR_VERSION=1.2.0
export SOLR_CLOUD_INIT_VERSION=1.2.0
export ZK_VERSION=3.5.5

export JUPYTER_VERSION=1.0.0-rc2
For Local Builds
export REPO=sdap-local

docker pull bitnami/cassandra:${CASSANDRA_VERSION}
docker pull bitnami/rabbitmq:${RMQ_VERSION}
docker pull zookeeper:${ZK_VERSION}

docker pull nexusjpl/jupyter:${JUPYTER_VERSION}
Continue to the section: “Create a new Docker Bridge Network”
For Release Builds: Pull Docker Images
export REPO=apache

docker pull bitnami/cassandra:${CASSANDRA_VERSION}
docker pull bitnami/rabbitmq:${RMQ_VERSION}
docker pull apache/sdap-collection-manager:${COLLECTION_MANAGER_VERSION}
docker pull apache/sdap-granule-ingester:${GRANULE_INGESTER_VERSION}
docker pull apache/sdap-nexus-webapp:${WEBAPP_VERSION}
docker pull apache/sdap-solr-cloud:${SOLR_VERSION}
docker pull apache/sdap-solr-cloud-init:${SOLR_CLOUD_INIT_VERSION}
docker pull zookeeper:${ZK_VERSION}

docker pull nexusjpl/jupyter:${JUPYTER_VERSION}
Create a new Docker Bridge Network
This quickstart consists of launching several Docker containers that need to communicate with one another. To facilitate this communication, we want to be able to reference containers via hostname instead of IP address. The default bridge network used by Docker only supports this by using the --link option which is now considered to be deprecated.
The currently recommended way to achieve what we want is to use a user defined bridge network and launch all of the containers into that network.
The network we will be using for this quickstart will be called sdap-net. Create it using the following command:
docker network create sdap-net
Start Core Components
NEXUS relies on Apache Solr and Apache Cassandra to store tile metadata and science data, so let’s start those first.
Start Zookeeper
In order to run Solr in cloud mode, we must first run Zookeeper.
docker run --name zookeeper -dp 2181:2181 zookeeper:${ZK_VERSION}
We then need to ensure the /solr znode is present.
docker exec zookeeper bash -c "bin/zkCli.sh create /solr"
Start Solr
SDAP is tested with Solr version 8.11.1.
Note
Mounting a volume is optional but if you choose to do it, you can start and stop the Solr container without having to reingest your data every time. If you do not mount a volume, every time you stop your Solr container the data will be lost. If you don’t want a volume, leave off the -v option in the following docker run command.
To start Solr using a volume mount and expose the admin webapp on port 8983:
export SOLR_DATA=~/nexus-quickstart/solr
mkdir -p ${SOLR_DATA}
docker run --name solr --network sdap-net -v ${SOLR_DATA}/:/bitnami -p 8983:8983 -e ZK_HOST="host.docker.internal:2181/solr" -d ${REPO}/sdap-solr-cloud:${SOLR_VERSION}
This will start an instance of Solr. To initialize it, we need to run the solr-cloud-init image.
docker run -it --rm --name solr-init --network sdap-net -e SDAP_ZK_SOLR="host.docker.internal:2181/solr" -e SDAP_SOLR_URL="http://host.docker.internal:8983/solr/" -e CREATE_COLLECTION_PARAMS="name=nexustiles&numShards=1&waitForFinalState=true" ${REPO}/sdap-solr-cloud-init:${SOLR_CLOUD_INIT_VERSION}
When the init script finishes, kill the container by typing Ctrl + C
Starting Cassandra
SDAP is tested with Cassandra version 3.11.6.
Note
Similar to the Solr container, using a volume is recommended but not required. Be aware that the second -v option is required.
Before starting Cassandra, we need to prepare a script to initialize the database.
export CASSANDRA_INIT=~/nexus-quickstart/init
mkdir -p ${CASSANDRA_INIT}
cat << EOF >> ${CASSANDRA_INIT}/initdb.cql
CREATE KEYSPACE IF NOT EXISTS nexustiles WITH REPLICATION = { 'class': 'SimpleStrategy', 'replication_factor': 1 };

CREATE TABLE IF NOT EXISTS nexustiles.sea_surface_temp  (
tile_id       uuid PRIMARY KEY,
tile_blob     blob
);
EOF
Now we can start the image and run the initialization script.
export CASSANDRA_DATA=~/nexus-quickstart/cassandra
mkdir -p ${CASSANDRA_DATA}
docker run --name cassandra --network sdap-net -p 9042:9042 -v ${CASSANDRA_DATA}/cassandra/:/bitnami -v "${CASSANDRA_INIT}/initdb.cql:/scripts/initdb.cql" -d bitnami/cassandra:${CASSANDRA_VERSION}
Wait a few moments for the database to start.
docker exec cassandra bash -c "cqlsh -u cassandra -p cassandra -f /scripts/initdb.cql"
With Solr and Cassandra started and initialized, we can now start the collection manager and granule ingester(s).
Start the Ingester
In this section, we will start the components for the ingester. These components are:
one or more granule ingesters which process data granules into NEXUS tiles;
the collection manager which watches for new granules and tells the ingesters about them and how they should be processed; and
RabbitMQ which handles communication between the collection manager and ingesters.
We will also be downloading a number of NetCDF files containing science data for use in this demo.
Create Data Directory
Let’s start by creating the directory to hold the science data to ingest.
Choose a location that is mountable by Docker (typically needs to be under the user’s home directory) to download the data files to.
export DATA_DIRECTORY=~/nexus-quickstart/data/avhrr-granules
mkdir -p ${DATA_DIRECTORY}
Start RabbitMQ
The collection manager and granule ingester(s) use RabbitMQ to communicate, so we need to start that up first.
docker run -dp 5672:5672 -p 15672:15672 --name rmq --network sdap-net bitnami/rabbitmq:${RMQ_VERSION}
Start the Granule Ingester(s)
The granule ingester(s) read new granules from the message queue and process them into tiles. For the set of granules we will be using in this guide, we recommend using two ingester containers to speed up the process.
cat << EOF >> granule-ingester.env
RABBITMQ_HOST=host.docker.internal:5672
RABBITMQ_USERNAME=user
RABBITMQ_PASSWORD=bitnami
CASSANDRA_CONTACT_POINTS=host.docker.internal
CASSANDRA_USERNAME=cassandra
CASSANDRA_PASSWORD=cassandra
SOLR_HOST_AND_PORT=http://host.docker.internal:8983
EOF

docker run --name granule-ingester-1 --network sdap-net -d --env-file granule-ingester.env \
       -v ${DATA_DIRECTORY}:/data/granules/ ${REPO}/sdap-granule-ingester:${GRANULE_INGESTER_VERSION}

docker run --name granule-ingester-2 --network sdap-net -d --env-file granule-ingester.env \
       -v ${DATA_DIRECTORY}:/data/granules/ ${REPO}/sdap-granule-ingester:${GRANULE_INGESTER_VERSION}
[OPTIONAL] Run Message Queue Monitor
The granule ingestion process can take some time. To monitor its progress, we wrote a simple python script to monitor the message queue. It will wait until some granules show up and then will exit once they have all been ingested.
The script only needs the requests module, which can be installed by running pip install requests if you do not have it.
To download the script:
curl -O https://raw.githubusercontent.com/apache/incubator-sdap-nexus/master/tools/rmqmonitor/monitor.py
And then run it in a separate shell
python monitor.py
Download Sample Data
The data we will be downloading is part of the AVHRR OI dataset which measures sea surface temperature. We will download 1 month of data and ingest it into a local Solr and Cassandra instance.
Note
Before you are able to download the test data, you will need to Create an Earthdata Login.
Then go ahead and download 1 month worth of AVHRR netCDF files.
cd $DATA_DIRECTORY

curl -O https://raw.githubusercontent.com/apache/incubator-sdap-nexus/master/docs/granule-download.sh
chmod 700 granule-download.sh
./granule-download.sh

rm granule-download.sh
You should now have 30 files downloaded to your data directory, one for each day in November 2015.
Create Collection Configuration
The collection configuration is a .yml file that tells the collection manager what datasets it is managing, where the granules are stored, and how they are to be tiled.
export CONFIG_DIR=~/nexus-quickstart/ingester/config
mkdir -p ${CONFIG_DIR}
cat << EOF >> ${CONFIG_DIR}/collectionConfig.yml
collections:
  - id: AVHRR_OI_L4_GHRSST_NCEI
    path: /data/granules/*.nc
    priority: 1
    forward-processing-priority: 5
    projection: Grid
    dimensionNames:
      latitude: lat
      longitude: lon
      time: time
      variable: analysed_sst
    slices:
      lat: 100
      lon: 100
      time: 1
EOF
Note
The values under slices determine the tile sizes. We used the configuration above for faster ingestion time, but be aware there is a tradeoff between ingestion time and analysis time. Larger tile sizes yield faster ingestion times but slower analysis times and vice versa.
Feel free to edit the tile size in the configuration we just created, but keep the aforementioned tradeoff in mind.
Start the Collection Manager
Now we can start the collection manager.
docker run --name collection-manager --network sdap-net -v ${DATA_DIRECTORY}:/data/granules/ -v ${CONFIG_DIR}:/home/ingester/config/ -e COLLECTIONS_PATH="/home/ingester/config/collectionConfig.yml" -e HISTORY_URL="http://host.docker.internal:8983/" -e RABBITMQ_HOST="host.docker.internal:5672" -e RABBITMQ_USERNAME="user" -e RABBITMQ_PASSWORD="bitnami" -d ${REPO}/sdap-collection-manager:${COLLECTION_MANAGER_VERSION}
When it starts, it will publish messages for the downloaded granules to RabbitMQ and the ingesters will automatically begin processing the data (it may take a few moments for this to kick in). You can monitor the progress of the ingestion in several ways:
You can use the above mentioned script. Ingestion is completed when the script exits.
You can tail the ingester containers’ logs with a command like
docker logs -f <container-name>and wait for activity to cease.You can monitor the message queue at http://localhost:15672/#/queues/%2F/nexus. Use username
userand passwordbitnami. Ingestion is completed when the ‘Ready’, ‘Unacked’, and ‘Total’ message counts are all zero.
Note
There are known issues that can occur during the ingestion process, you can find more information on them in the ‘Known Issues’ section at the end of this document.
Note
It is recommended you do not download new granules to the data directory, as doing so can result in duplicate messages being published due to the collection manager flagging the partially and completely downloaded granule as new granules.
To work around this:
Download granules to a separate directory and move them to the data directory.
Use a temporary filename then rename.
curl -o <GRANULE_NAME>.tmp <GRANULE_URL> && mv <GRANULE_NAME>.tmp <GRANULE_NAME>
Start the Webapp
Now that the data is being (has been) ingested, we need to start the webapp that provides the HTTP interface to the analysis capabilities. This is currently a python webapp running Tornado and is contained in the nexus-webapp Docker image. To start the webapp and expose port 8083 use the following command:
docker run -d --name nexus-webapp --network sdap-net -p 8083:8083 ${REPO}/sdap-nexus-webapp:${WEBAPP_VERSION} python3 /incubator-sdap-nexus/analysis/webservice/webapp.py --solr_host="http://host.docker.internal:8983" --cassandra_host=host.docker.internal --cassandra_username=cassandra --cassandra_password=cassandra
Note
If you see a message like docker: invalid reference format it likely means you need to re-export the WEBAPP_VERSION environment variable again. This can happen when you open a new terminal window or tab.
This command starts the nexus webservice and connects it to the Solr and Cassandra containers. It also sets the configuration for Spark to use local mode with 4 executors.
After running this command you should be able to access the NEXUS webservice by sending requests to http://localhost:8083. A good test is to query the /list endpoint which lists all of the datasets currently available to that instance of NEXUS. For example:
curl -X GET http://localhost:8083/list
Note
You may need to wait a few moments before the webservice is available.
Launch Jupyter And Run The Demo Notebook
At this point NEXUS is running and you can interact with the different API endpoints. However, there is a python client library called nexuscli which facilitates interacting with the webservice through the Python programming language. The easiest way to use this library is to start the Jupyter notebook docker image from the SDAP repository. This image is based off of the jupyter/scipy-notebook docker image but comes pre-installed with the nexuscli module and an example notebook.
To launch the Jupyter notebook use the following command:
docker run -it --rm --name jupyter --network sdap-net -p 8888:8888 nexusjpl/jupyter:${JUPYTER_VERSION} start-notebook.sh --NotebookApp.password='sha1:a0d7f85e5fc4:0c173bb35c7dc0445b13865a38d25263db592938'
This command launches a Juypter container and exposes it on port 8888.
Note
The password for the Jupyter instance is quickstart
Once the container starts, navigate to http://localhost:8888/. You will be prompted for a password, use quickstart. After entering the password, you will be presented with a directory structure that looks something like this:
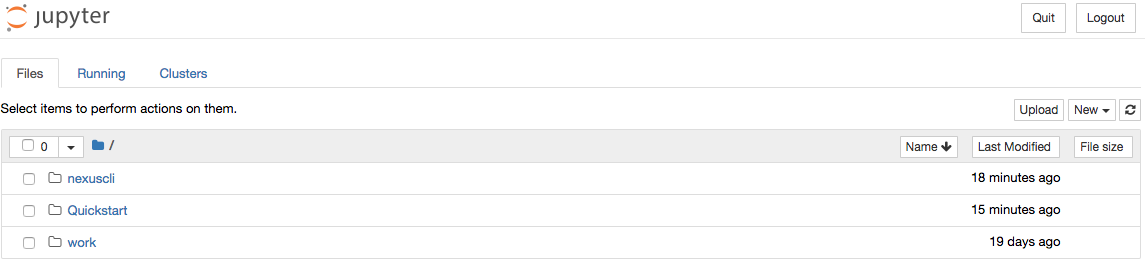
Click on the Quickstart directory to open it. You should see a notebook called Time Series Example:
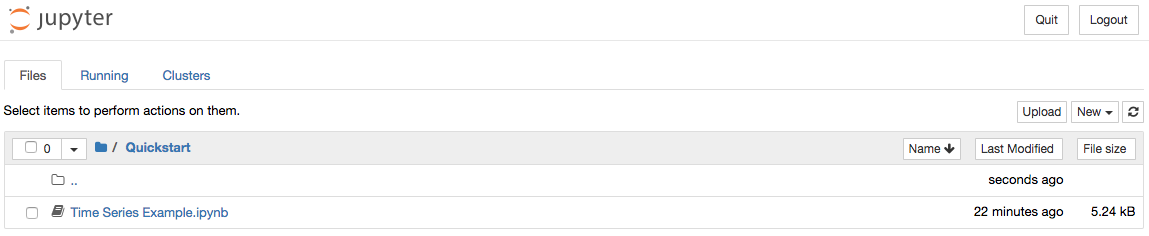
Click on the Time Series Example notebook to start it. This will open the notebook and allow you to run the two cells and execute a Time Series command against your local instance of NEXUS.
Finished!
Congratulations you have completed the quickstart! In this example you:
Learned how to ingest data into NEXUS datastores
Learned how to start the NEXUS webservice
Learned how to start a Jupyter Notebook
Ran a time series analysis on 1 month of AVHRR OI data and plotted the result
Cleanup
To shut down the Solr container cleanly, run the following command:
docker exec solr /opt/bitnami/solr/bin/solr stop -p 8983
The remaining containers can safely be stopped using Docker Desktop or by running
docker stop <container-name>
Known Issues
This section contains a list of issues that may be encountered while running this guide, their causes and solutions.
Granule Ingester Containers Crash
While ingesting data, the granule ingester containers may crash. You can tell this has happened if:
The status of one or more of the ingester containers is not ‘running’
The monitor script output shows a number of in progress tasks less than the number of ingesters and a nonzero number of waiting tasks
The browser interface shows a number of ‘unacked’ messages less than the number of ingesters and a nonzero number of ‘ready’ messages
The cause of these crashes seems to be a loss of connection to the Solr container.
There are two solutions to this issue:
Restart the container(s) with the command:
docker restart <container-name>or through Docker DesktopTry running only one ingester container.
Collection Manager Messages Not Publishing
RabbitMQ may not receive the messages published by the Collection Manager. When this happens, new granules added to monitored collections will not be processed by the ingester(s).
The cause of this issue seems to be due to the RMQ container having limited resources, which causes message publication to block indefinitely.
To solve this, first figure out which resource is causing issues by navigating to http://localhost:15672/#/ and sign in with username user and password bitnami. View the ‘Nodes’ section. Insufficient resources will be shown in red. Allocate more of those resources in Docker and restart the Docker daemon.